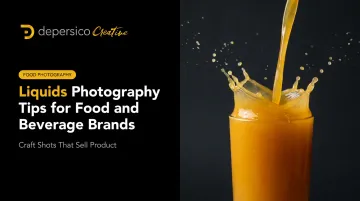
That's not a creative opinion — it's a commercial reality. A pour, a splash, a bead of condensation on cold glass: these images communicate freshness, flavor, and quality before a shopper's conscious mind has engaged. For food and beverage brands, liquid photography isn't a stylistic choice. It's a selling tool.
This guide covers what makes liquid shots compelling, the core techniques professionals use, lighting strategies that actually work, and how to brief a photographer to get results that perform — on packaging, in paid ads, and at retail.
Key Takeaways
- Liquid photography triggers purchase desire faster than text or static product shots
- Flash duration (not shutter speed) is what freezes motion in pour and splash photography
- Backlighting is the single most impactful variable for making translucent beverages look appetizing
- Color accuracy matters as much on-screen as in print; muddy or oversaturated imagery erodes consumer trust
- A strong brief starts with an emotional goal, not a technical spec
Why Liquid Photography Drives Purchase Decisions
The Visual Appetite Effect
Consumers process visual food and drink cues before any rational evaluation kicks in. The image is the first moment of persuasion — and on a physical shelf, it has to work entirely on its own.
NielsenIQ BASES data drawn from over 4,000 packs and shelves found that top-performing package designs are noticed by nearly 70% more consumers than bottom-performing ones. And in a separate Ipsos survey of 2,002 U.S. adults, 72% agreed that package design often influences their purchase decisions.
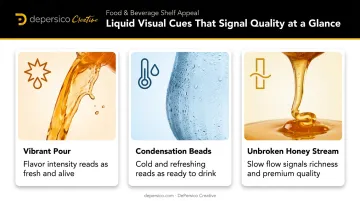
Within that design system, liquid imagery does some of the heaviest lifting. A vibrant, well-lit pour signals flavor intensity. Condensation signals temperature. A clean, unbroken stream of honey signals richness. All of that lands in a fraction of a second, without a single word read.
The Multi-Channel ROI Argument
That instant communication power extends well beyond the shelf. A single strong hero shot can anchor:
- Packaging front panels and side panels
- Paid social and digital display ads
- In-store point-of-sale displays
- E-commerce product listings
- Trade sell sheets and broker materials
That's a significant return on a single photography investment. For food and beverage brands — whether it's a juice brand, a craft sauce, a flavored sparkling water, or a functional drink — the liquid itself is the product's most visible differentiator. Getting that shot right is what turns shelf presence into shelf performance.
The Building Blocks of a Compelling Liquid Shot
Composition and Vessel Choice
Vessel material determines the entire compositional strategy before the camera fires. Each surface type calls for a different approach:
- Clear glass — lets light pass through, creating internal glow and revealing color depth
- Opaque packaging — shifts focus to pours, streams, or splashes positioned outside the container
- Frosted surfaces — add tactile texture cues that signal temperature and premium feel
Within any vessel choice, rule-of-thirds framing and deliberate use of negative space let motion elements — splashes, arcs, drizzle streams — breathe in the frame without competing with the product itself.
Color Saturation and Accuracy
Liquid color is a primary taste signal. A juice that photographs with a dull, brownish cast tells the shopper the product is low quality, even if it isn't. Vivid, accurate color creates immediate appetite appeal.
The risk runs both ways:
- Too muted: signals staleness or low ingredient quality
- Oversaturated: looks artificial and breaks consumer trust, especially when the actual product doesn't match
Color accuracy becomes critical when liquid photography appears on packaging, because it sets an expectation that the product must physically meet on shelf.
Motion vs. Stillness
Not every liquid shot should freeze action. The motion decision should follow the brand's positioning:
- Frozen splashes and dynamic pours — carbonated drinks, energy beverages, fruit juices where excitement and refreshment are the core message
- Smooth, slow-flow imagery — premium syrups, olive oils, high-end sauces, functional health drinks where indulgence or purity is the key signal
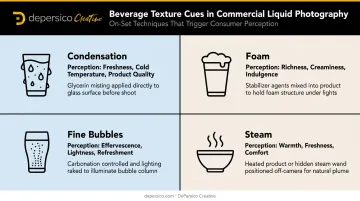
Texture Cues That Communicate Freshness
Secondary elements drive purchase instinct:
- Condensation on a cold glass signals temperature and refreshment
- Foam on coffee or a functional shake signals freshness and body
- Fine bubbles in carbonated beverages signal effervescence
- Steam rising from a hot soup or broth signals warmth and comfort
Each of these requires specific on-set techniques. Glycerin misting simulates condensation — it clings to glass surfaces and photographs convincingly. Foam stabilizers keep beverage heads camera-ready across multiple takes.
Props and Context
A liquid shot rarely exists in isolation. The glass, surface material, background, and garnishes all frame the product story. Prop choices must align with the brand's identity:
- Raw wood and linen — craft brands, artisan sauces, small-batch products
- White marble and clean negative space — premium health beverages, functional drinks
- Wet slate or dark surfaces — coffee, dark spirits-adjacent products, indulgent categories
Every prop earns its place by reinforcing what the liquid itself is trying to say. When in doubt, remove it — the liquid is the hero.
Liquid Photography Techniques Every Brand Should Know
Splash and Pour Photography
Freezing a liquid mid-air — a drop hitting a surface, a dramatic arc of juice — requires fast flash duration. This is the most misunderstood technical point in liquid photography.
Shutter speed alone won't freeze liquid motion. In a studio with controlled ambient light, it's the brief burst of flash that stops the liquid in place, not the mechanical shutter. The relevant measurement is flash duration — specifically the t0.1 rating, which captures the duration in which 90% of the flash pulse occurs, as defined by Elinchrom.
Broncolor's beverage bottle setup documentation cites a t0.1 of 1/5,600 second as sufficient to freeze a water splash, with their Scoro S reaching 1/10,000 second t0.1 at lower power settings.
When evaluating a studio's capability for splash work, ask specifically about t0.1 flash duration — not t0.5, which Broncolor explicitly states cannot be reliably compared across flash systems due to varying pulse shapes.
Flow and Drizzle Photography
Viscous liquids — sauces, honey, syrups, salad dressings — require a different approach. The goal here is an unbroken, smooth stream that communicates richness. Key variables include:
- Pour speed — too fast creates splashing; too slow creates drops rather than a stream
- Liquid viscosity — temperature affects this significantly on set
- Angle — the pour angle determines whether the stream catches light cleanly
Glassware and Condensation Shots
Shooting beverages in glass introduces specific challenges that commercial photographers plan for in advance:
- Managing reflections on curved surfaces without losing luminosity
- Achieving backlight glow without blowing out highlights
- Maintaining condensation consistency across multiple takes
As PPA's profile of commercial beverage photographer Martin Wonnacott notes, shiny bottles, curved surfaces, transparency, and condensation that changes during a shoot are the core technical problems in this category. Each of those variables compounds the others — which is why a controlled studio environment, with repeatable lighting setups and the ability to reset between takes, is the only reliable solution.
Why a Professional Studio Matters
Commercial-grade liquid photography requires a controlled environment. Location variables — ambient light shifts, temperature changes, surface inconsistencies — make achieving repeatable results nearly impossible outside a purpose-built studio.
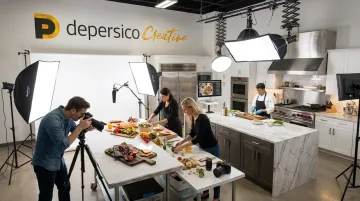
DePersico Creative operates a fully equipped in-house studio and test kitchen at their West Chester, PA facility. Food stylists, culinary staff, and photographers work together in the same space — so product prep and photography happen in one coordinated workflow.
That setup matters most when a brand is shooting multiple SKUs in a single engagement. Consistent lighting, consistent product prep, and the ability to reset quickly between takes are what keep results uniform across an entire product line.
Lighting Strategies That Make Liquids Look Irresistible
Lighting is the single biggest variable in liquid photography. The difference between a flat, forgettable shot and one that stops a shopper mid-scroll often comes down to where the light is placed — and how it's controlled.
Backlighting for Translucent Liquids
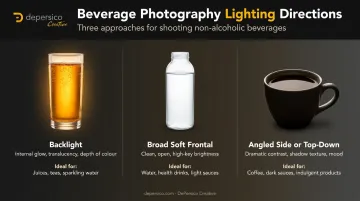
For juices, teas, sparkling waters, and any translucent beverage, place a light source behind the glass. The liquid glows from within: color vibrancy intensifies, bubbles and internal detail become visible, and the overall perception of freshness increases.
Canon's professional photography tutorial recommends heavily diffused backlighting specifically for cold beverages, noting that it reveals the liquid's color, internal bubbles, and detail without harsh glass reflections.
In Broncolor's fruit and liquid photography case work, a gridded backlight was used specifically to reveal airborne droplets and mist while adding brilliance to the liquid — a technique that makes splash imagery far easier to read.
Diffusion to Control Reflections
Bare lights create harsh, distracting reflections on glass and liquid surfaces. Diffusion panels, softboxes, and acrylic diffusers soften those reflections while maintaining luminosity. In Broncolor's bottle-lighting setup documentation, a large softbox combined with an acrylic rear diffusion panel replaced broad dark edges and uneven reflections with controlled gradients and even, consistent light.
Matching Light to the Emotional Message
| Light Direction | Effect | Best For |
|---|---|---|
| Backlight | Internal glow, vibrancy | Juices, teas, sparkling water, clear beverages |
| Broad soft frontal | Clean, fresh, open | Water, health drinks, light sauces |
| Angled side or top-down | Drama, depth, contrast | Coffee, dark sauces, indulgent products |
Common Liquid Photography Mistakes That Hurt Brand Appeal
Three mistakes show up repeatedly in liquid photography — and each one erodes brand appeal before a consumer even reads the label. Here's what to watch for.
Flat, Undirected Lighting
Single-source flat lighting eliminates depth, glow, and dimension. It's the most common reason DIY or under-resourced liquid photography looks unappetizing — even when the product itself is excellent. Without directional light, liquids photograph as opaque and lifeless.
Inaccurate or Oversaturated Color
Color errors in liquid photography have direct commercial consequences — especially on packaging. A muted color suggests low quality. Oversaturated color looks artificial and sets a consumer expectation the physical product can't meet. Consistent monitor calibration throughout post-production is the most reliable control against color drift; the Professional Photographers of America recommends regular screen profiling as a baseline standard.
Overcrowded Compositions
Too many props, too much background texture, or a cluttered surface all pull the viewer's eye away from the liquid. To keep the visual hierarchy clear:
- Limit props to one or two items that reinforce the brand story
- Choose backgrounds that complement the liquid's color, not compete with it
- Leave negative space — the liquid needs room to breathe
- Ask whether each element earns its place or simply fills the frame
How to Brief a Photographer for Liquid Shots That Sell
Start With the Emotional Goal
The most effective liquid photography briefs begin not with technical specs but with the feeling the image must create. Is it refreshing? Indulgent? Pure? Warming? Energizing? That emotional target guides every decision — from the motion choice to the lighting direction to the prop selection.
Once that feeling is locked in, the technical specs fall into place around it.
Provide Brand and Packaging Context
Photographers need to see the label design, the color palette, and the packaging format before the shoot. Photography that's developed without that context often needs to be retrofitted — and it rarely integrates as naturally as imagery built alongside the packaging system from the start.
Supply:
- Label files or packaging mockups
- Brand color values (Pantone, CMYK, RGB)
- Typography and tone reference
- Competitive set examples (what to avoid as much as what to emulate)
Consider an Integrated Creative Partner
For food and beverage brands, the strongest liquid imagery comes from a process where photography is developed as part of a cohesive brand story — built in step with the packaging, not retrofitted after the fact.
DePersico Creative has spent over 45 years working with food and beverage brands, from national CPG portfolios to emerging startups, with brand strategy, packaging design, and in-house photography all handled under one roof. That integration means liquid imagery is built to serve the packaging system it will appear on from day one.
Frequently Asked Questions
What makes liquid photography different from regular food photography?
Liquid photography requires specialized lighting — particularly fast flash duration for motion shots and precise backlighting for translucent beverages — plus additional styling expertise for condensation, foam, and controlled pours. Color accuracy is also a higher-stakes requirement than in most static food photography.
How do professional photographers freeze motion in liquid splash shots?
Frozen motion is achieved through fast flash duration, specifically a t0.1 measurement of 1/5,600 second or faster. The brief burst of light stops the liquid mid-air, with the camera's mechanical shutter speed playing a secondary role when ambient light is controlled.
What type of lighting works best for beverage photography?
Backlighting is the standard choice for translucent beverages like juice, tea, and sparkling water because it creates an internal glow effect. Diffused side or top-down lighting works better for opaque liquids and surface shots, such as coffee, soup, or cream-based products.
How does liquid photography impact packaging design?
Liquid imagery on packaging functions as a direct quality and flavor signal — one of the highest-impact elements in a shopper's split-second decision. Poor-quality photography actively undermines an otherwise well-designed label by setting the wrong expectation before purchase.
Do you need a professional studio for high-quality liquid photos?
Basic pours are achievable with minimal equipment, but commercial-grade imagery requires a controlled studio with professional lighting, proper diffusion, and the ability to reset and reshoot consistently across multiple takes.
What styling tricks make beverages look more appetizing?
Glycerin misting simulates condensation reliably, fresh ice signals coldness, foam stabilizers keep beverage heads consistent across takes, and carefully chosen garnishes or rim dressings reinforce flavor without competing with the liquid for attention.